
What is StatCounter?
StatCounter is a Free online monitoring software that provides essential information about who visits your website. It keeps track of popular pages, download activity, download counts, recent visitor activity, exit links, keyword analysis and a bundle more things that matters.
You can even discover the IP Address of the visitors visiting your blog which is not possible with Google Analytics. Later on your can use the block the user using IP Address in blogger.
How to Install StatCounter in Blogger
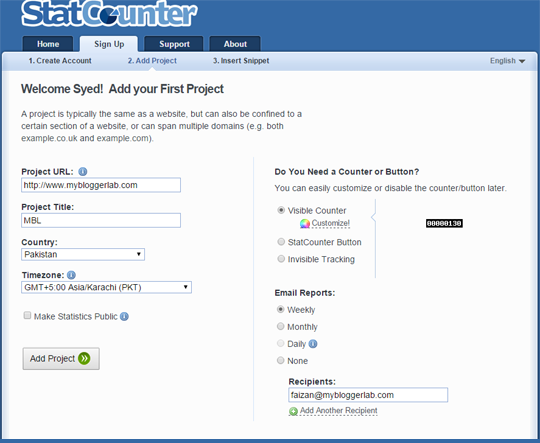
So to get started go to Statcounter.com and register for a new account. Registering an account is simple, enter your email, password, full name and other information. Once you’re done creating and setting up your account details click on “Create Account”, move to the next step.After signing up, add a project to your account, insert project URL (your website link to track), project title, country and Timezone. You have some optional features as well, you can choose whether to display a stat counter to your visitors or do invisible tracking without displaying any counter button. Once you are done with writing details, press "Add Project" button.
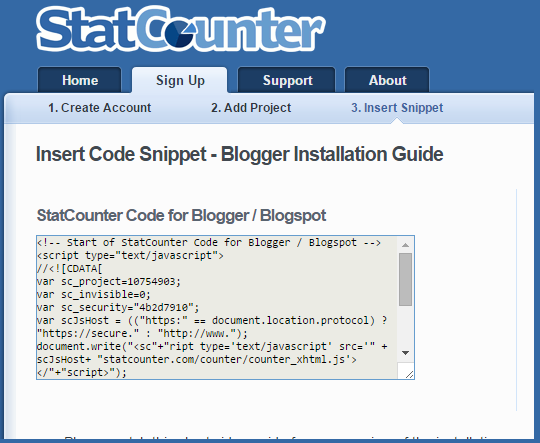
Now from list of multiply platform select "Blogger" if you are not using blogger you can choose any other listed platform. After selecting Blogger you will get a tracking code which you need to insert in the template codes of your blog.
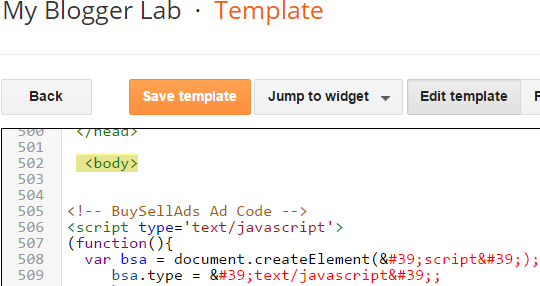
Go to Blogger >> Template >> Edit HTML >> search for </body> and just above it paste your code you copied in the previous step.
After installing the code on your blogger site, go back to statcounter.com, To be able to see reports correctly, you need to verify if your code was installed correctly and to do so click on "Check installation" as you can see in the screenshot below.
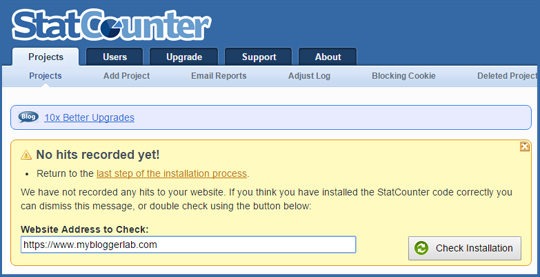
If you have installed the code correctly onto your website, you will see the message as it is shown in the screenshot below. After verification your website is ready to track all the essential information that you need to know about your user.

The Editorial Team of MyBloggerLab consists of a group of Professional Blogger geeks Led by Syed Faizan Ali (Founder of MyBloggerLab).


1 comments:
What's the different between Blogger default stat and StatCounter?
Post a Comment
We’re eager to see your comment. However, Please Keep in mind that all comments are moderated manually by our human reviewers according to our comment policy, and all the links are nofollow. Using Keywords in the name field area is forbidden. Let’s enjoy a personal and evocative conversation.