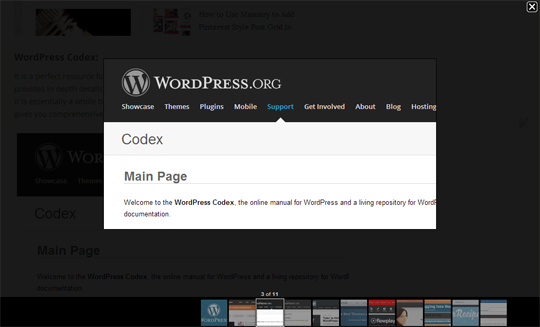
Before we start working with our tutorial, we have assembled two screenshots below demonstrating that how your Lightbox would appear before and after applying the customization. It would certainly look more elegant and polished.
Before:

After:
The very first thing you need to do is to login into your Google Account and go to Blogger ›› Template ›› Edit HTML. Now within the template coding search for the ]]></b:skin> tag and just above it paste the following piece of stylesheet coding. (Note: In the following CSS, we have added comments to help you identify that how you can customize different aspects of your Lightbox like text color, background color, close button and etc).
/* MBL Blogger Lightbox
———————————————– */
/* Background Color */
.CSS_LIGHTBOX_BG_MASK {
background-color: #ffffff !important;
background-image: url(image-url-address) !important;
opacity: 0.8 !important;
filter: alpha(opacity=90) !important;
}
/* Images Border */
.CSS_LIGHTBOX_SCALED_IMAGE_IMG {
outline: 0px solid #fff !important;
-webkit-border-radius: 10px;
-moz-border-radius: 10px;
border-radius: 10px;
-webkit-box-shadow: 0px 0px 5px #000000;
-moz-box-shadow: 0px 0px 5px #000000;
box-shadow: 0px 0px 5px #000000;
}
/* Close Button */
.CSS_LIGHTBOX_BTN_CLOSE {
background: url(image-url-address) no-repeat !important;
width: 24px !important;
height: 24px !important;
}
/* Thumbnails Bar Color */
.CSS_LIGHTBOX_FILMSTRIP {
background-color: #eaeaea !important;
border-top:1px solid #d2d2d2!important;
}
/* Text Color */
.CSS_LIGHTBOX_ATTRIBUTION_INFO, .CSS_LIGHTBOX_ATTRIBUTION_LINK {
color: #000 !important;
}
/* Index Info (number of images) */
.CSS_LIGHTBOX_INDEX_INFO {
color: #555555 !important;
}
Congratulations: Save the template by pressing the orange “Save Template” button located right at the top of your screen. Now you have successfully customized your image Lightbox with just simple CSS technique.
We hope this tutorial may have helped you in learning How to customize an image light box in blogger. Do let us know if you are already using this technique? At MyBloggerLab, we have disabled Lightbox because it interferes while a person is reading a long tutorial. However, those who have wallpapers or portfolio sites can use it Freely. If you like this article, then share it with your friends on Facebook, Twitter and Google+.
The Editorial Team of MyBloggerLab consists of a group of Professional Blogger geeks Led by Syed Faizan Ali (Founder of MyBloggerLab).


6 comments
This is an Good one !
Thank you ..
You are very good!
:)
Really Awesome bro your web designing knowledge and skills really awesome. Bro i want to learn blogger templates design please help me :)
Thanks.
Hi Faizan & Team !
Thanks for sharing all that cool stuff on mybloggerlab.com. I have a question regarding the blogger lightbox. I have observed many times that after installing a custom blogger template, the lightbox does not work any more. Take the example of Templateism's Vortex template for instance. Is there anyway to get the lightbox working after installing the custom template which normally works on the default blogger templates?
Thank you in anticipation !
Hi, Most of the custom themes doesn't support lightbox. We will come up with the tutorial to get it working on custom themes too. Cheers!
great tutorial dear
Post a Comment
We’re eager to see your comment. However, Please Keep in mind that all comments are moderated manually by our human reviewers according to our comment policy, and all the links are nofollow. Using Keywords in the name field area is forbidden. Let’s enjoy a personal and evocative conversation.